And this is the finished apron...after a broken sewing machine needle and a lot of mixing and matching!
Friday, 19 February 2010
Mini Apron
I wanted to make a piece that combines all the techniques and processes used so far, adapting some of them to create a functional and wearable item. With my new technique of sticking the squares of plywood onto the fabric before stitching it is a lot easier to create bigger pieces of the fabric. I started my design with the generic full apron shape and I drew the basic shape onto a piece of squared screen printed fabric. I wanted to start small so as not to waste any fabric or plywood just in case the laser cutting machine wouldn't do exactly what I wanted! I then transferred this design into illustrator ready for the laser cutter. It took a while to work out how to get the plywood squares in line with the screen printed squares on the fabric but I eventually worked it out and the laser cutting machine got to work.
I then stuck the broken shape onto the fabric, lining up the squares with the squares of the fabric.
The next stage was to stitch between all the pieces of plywood...
I then stuck the broken shape onto the fabric, lining up the squares with the squares of the fabric.
The next stage was to stitch between all the pieces of plywood...
Fastenings and Attachments
The next stage of my work is neatening up edges and finding fastenings and attachments that are in keeping with the work as well as practical and hard-wearing. I have found that it is quite simple to sew a button hole in-between the squares of plywood. This creates a strong and durable opening for a toggle or a simple button.
I have also been working on hemming and neatening edges to stop fraying and trap the plywood within the fabric.
This is just a simple stitch which hides the frayed edges from the front but would however need to be covered with another piece of fabric to neaten up the inside.
I have also been working on hemming and neatening edges to stop fraying and trap the plywood within the fabric.
This is just a simple stitch which hides the frayed edges from the front but would however need to be covered with another piece of fabric to neaten up the inside.
Monday, 8 February 2010
New Techniques...
I've been working on combining the two elements of my work- articulation and form and I have found a new technique of sewing the squares of plywood between two pieces of fabric. It does mean a lot of laborious pritt-sticking but I think it may be slightly more conventional than sewing along the horizontal lines and threading in each plywood square.
The squared background print that will be part of the final design is the guideline for sticking on the squares, ensuring each on has a slight gap between to allow for sewing space.
I started off wanting to make a whole apron but it has turned out to be more of a pouch that could possibly be attached to an apron with poppers/ribbon.
I bent 3 laminated pieces of ply into a slight curved shape in the vacuum packing machine. I then glued this onto the fabric between two areas of plywood squares. The next stage is to cover it with another piece of fabric and machine stitch between the squares.
Tuesday, 2 February 2010
Beginnings...
So my next big decision is deciding what my final collection will be for the degree show...I have a number of options from the tests I did last term but am slowly narrowing them down. Here are two ideas that are in the pipeline:
Apron:
This would be continued from the articulated tests that I did last term. I created a strong and durable fabric which moved freely and would be great as some kind of protection or tool pouch for a gardener. The fabric was created by sewing squares or triangles of ply wood between two pieces of screen printed calico. The idea of an apron for a gardener would be to protect whilst gardening and to have a number of separate uses such as a tool pocket, crop holder or waste pouch.
Seed Shakers/Containers or a Belt with gardening attachments:
These would be continued from the formed tests made last term. I am particularly drawn to the triangular shape that I created last term and think it worked really well in the tests I did attaching them to the body. These would work well as seed containers or shakers and could easily be attached to a belt.
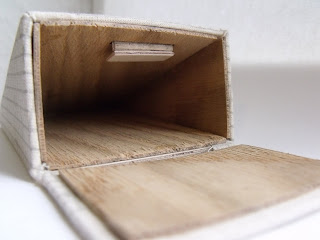
OR...a mixture of the two!
Subscribe to:
Posts (Atom)